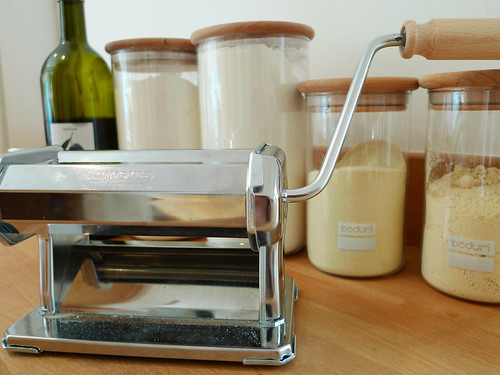
Here, after a bit of nagging on my part, is the recipe from the vegetarian husband, for egg-free pasta. It’s the culmination of weeks of testing the new Imperia pasta machine, the result of our recent foodie trip to Bologna, Italy.
In his own words:
‘In Italy most people eat pasta ‘scuitto‘ as their everyday choice of the world’s second most ubiquitous staple (after rice I’m guessing?). Scuitto is dried pasta. Why not fresh? Well, dried pasta is made with only durum wheat (or any other stated alternative such as buckwheat) and water, sometimes with salt added. Fresh pasta is almost always made with eggs. It is also very rich and more fattening!
Fresh pasta made with eggs is a principally north Italian product. In the deep south, where traditionally poverty has given the lead in the development of simple but nutritious meals, fresh pasta is often made without eggs. In the Puglia region for example, you can find fresh orecchietti (little ears), a delicious form of pasta that has a similar function to gnocchi when fresh.
As someone who prefers not to eat eggs in any form, and having recently bought an Imperia pasta machine, I decided to research recipes for egg-free fresh pasta and to experiment with my own ingredients to achieve a pasta that would be suitable for stuffing (ravioli, tortelloni, cannelloni etc) as well as for noodle varieties (like spaghetti or tagliatelle).
This is not as simple as it sounds, because a simple pasta dough of flour and water is not as elastic as one made with the addition of eggs. Adding any kind of wholemeal or alternative grains, like buckwheat, reduces the elasticity needed to an unacceptable level. I know because the first time I tried to make buckwheat noodles I used 100% buckwheat flour, with water, a little salt and olive oil. It was like mixing sand with water!
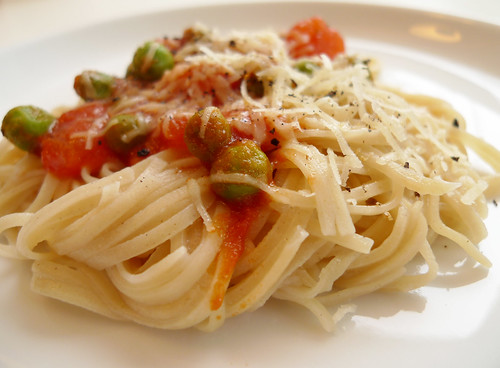
After some experimenting with different flours and a good deal of research, I finally came up with a fresh egg-free pasta that was flexible enough when just made, to make excellent cannelloni (stuffed with ricotta and spinach, see photo below) as well as for making and drying for spaghetti for later use.
I’ve never bothered to measure anything in 25 years of cooking, so bear with me, as I will use ‘parts’ to give measures. You can then make as much or as little as you wish, and even being a little ‘out’ on the quantities will make no real difference to the end result. Replacing parts with ‘cups’ will do as well. As you make your own fresh egg-free pasta two or three times, it will become second nature to you.
I don’t really like to use standard bleached industrial flour for anything, so my experiments used Italian organic ‘tipo 00′ – named for the finest setting on the millstone – as well as wholemeal semolina flour (literally just semolina from the supermarket will do as well) and some soya bean flour. Soya flour helps to replace the action of the eggs in binding the dough and helps relax elements in the other flours that help make the dough more ‘workable’. It also adds a pleasant yellow tinge that replaces the colour of egg yolks.
This is quite a long post, but the reality of the recipe is super simple. Some recipes for pasta dough are only a paragraph long. The truth is that is all you need, but if you’ve never made your own pasta before, it’s quite hard to believe that just adding water to flour and kneading it will make delicious pasta. So I’ll try to give you full descriptions of each stage to make it easier to know you are doing it right.
Ingredients:
- 1 part fine semolina (wholemeal or normal)
- 2 parts organic Italian flour Tipo 00 (or substitute with any organic strong flour)
- 1 part soya flour
- milled sea salt to taste
- 1 tbsp olive oil
- flour for dusting surfaces
- ½ cup warm water
Making the dough:
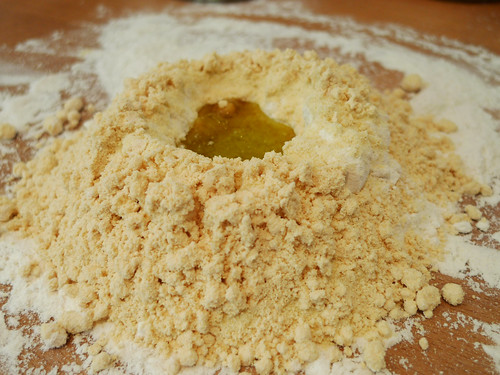
Make a little pyramid of the flours (in any order) on a hard kitchen work surface. Make a dent in the top with your hand and add the salt and olive oil. It should look like a mini volcano. Now add a small amount of the warm water, taking care not to add too much to overrun the crater in the flour, and start to mix using a fork. Draw the fork from the edges into the centre and turn over the mixture. Repeat this action, adding water as you go.
The water is added little by little and there is no real measure for how much you will need. You know it’s enough when the dough has incorporated most of the loose flour on your worktop (if your mixture, just add a little more flour).
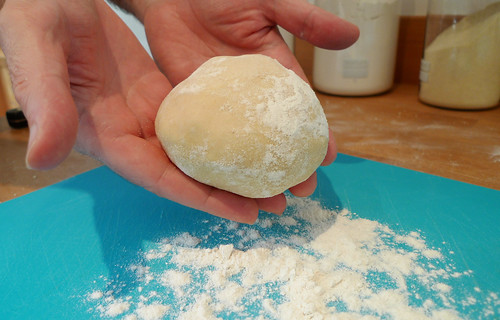
Once the flours are incorporated, it’s time to get your hands in. Form a ball from the soft mixture and start to knead it. You will need to dust your surface regularly with flour to stop the dough from sticking.
Knead the dough for at least 5 minutes but not more than 10. Then place the dough in a bowl and cover with a damp cloth to let it rest for 10 – 20 minutes.
If you are using a pasta machine, now is the time to get it clamped on and ready for rolling. If not, don’t worry. A rolling pin and a knife will serve just as well for making fettucine, tagliatelle or any other noodle style and is more authentic!
Depending on the type of pasta you are making, you will need somewhere to lay the sheets and then, if making noodles, to hang them. I use flexible cutting mats from IKEA, and wooden coat hangers for drying, so just improvise.
Once your dough has rested, pull a piece off about the size of a small apple and replace the dough under the cloth to stop it drying out.
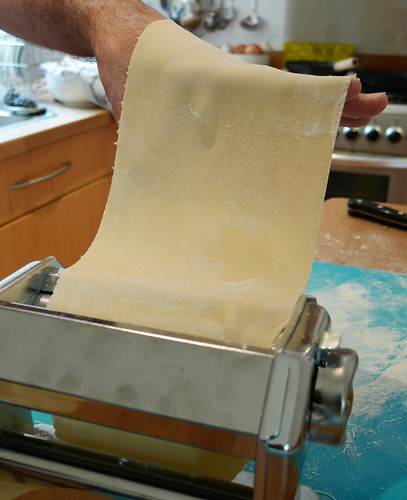
If using a machine, put it on the widest setting. Flatten your dough ball between your palms and flour it to stop it sticking to the rollers. Slowly feed it through the rollers, each time folding it into thirds, dusting the outsides and passing it through again. Do this six or seven times, then gradually narrow the settings and repeat the process two or three times per setting until you have a smooth elastic sheet of pasta that resembles a lasagne sheet. (If the pasta sheet becomes too long and unmanageable you can cut it in two, but try to keep each sheet as long as possible if making noodles or spaghetti).
Once your sheet is ready, lay it to dry on a dusted surface.
Pasta Sheets:
These sheets can be cut to size and used to make cannelloni, lasagne, or cut smaller and used to make ravioli or tortelloni with various fillings. If you are stuffing the pasta, then do not let the sheets dry out as you need as much elasticity left in the dough as possible when you shape them into filled parcels. Whilst working, keep the remaining sheets moist by covering them with a clean damp cloth.
Using a Pasta Machine:
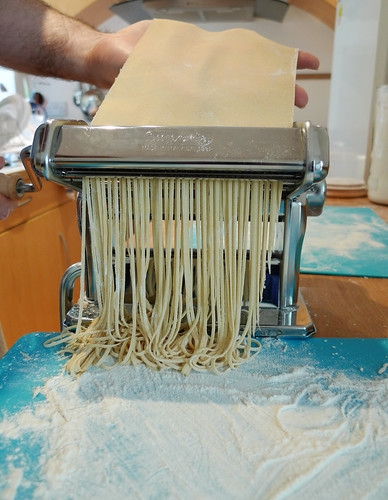
For machine cutting you need to let your sheets dry out for at least 20 mins, otherwise they will clog the cutters on your pasta machine.
Feed the sheets slowly through the cutter making sure that they fall onto a well dusted plate or surface as they come through the cutter. Sprinkle semolina flour across the piles of pasta to help them stay apart.
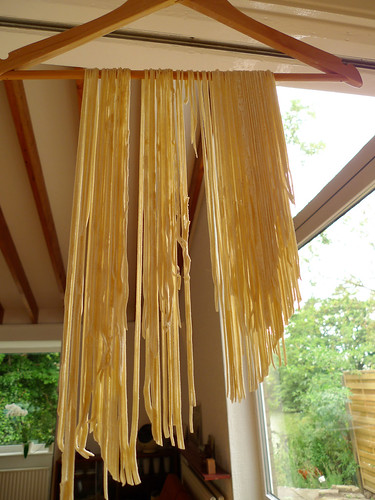
Hang your noodles to dry for a few hours, although you can also cook them straight away. Some may fall as they dry out so make sure you put a clean cloth underneath where you hang them so you can rescue them!
The resulting noodles should be generally as long as possible, but don’t discard shorter ones, as once cooked you won’t notice them.
Hand Rolling and Cutting:
If you are rolling by hand, follow the same process of rolling, folding, rolling and folding, until you have a even thin sheet.
If hand cutting your noodles, make sure you really coat each side of your sheet with flour before rolling it up loosely. With the roll horizontally in front of you, take a sharp knife and cut into strips vertically. How far apart you make each cut will depend on whether you want fine tagliatelle or wide fettucini. You can now unravel these strips and hang them to dry for at least an hour before cooking.
Cooking:
This kind of fresh pasta takes almost no time to cook. If you make it and then cook it soon after, you need only add it to boiling salted water, then bring the water back to the boil. For fine noodles this will be enough as they will continue to cook even as you drain them. For thicker pasta, 1 or 2 minutes more will be sufficient.
Making sure it’s al dente:
If you plan to add your pasta to a sauce (rather than serve the sauce on top of plain pasta), then a great trick for keeping it al dente is to add to a bowl of iced water immediately after draining from the pan. After a couple of minutes, drain the pasta again and add to your pan with the sauce and stir through. This will heat the pasta outside but the centre will remain al dente.
Enjoy your fresh pasta-making! Let me know how it goes!’


0 Comments:
Posting Komentar